Creating and publishing your own map service on the Internet is now very simple. Just process your image, upload the produced static files to a web hosting and open the map as an interactive layer in QGIS or other GIS software.
Advantages of WMTS service
WMTS, which stands for Web Map Tile Service, is a newer and extended version of WMS (Web Map Service) protocol. It allows you to open an interactive map layer from a remote server. Instead of serving one image per request, WMTS serves tiles (mostly 256x256 pixel size). The main advantage is that tiles can be pre-rendered on the server side and easily cached, which both reduces waiting time.
Prepare an image for a map service
Loading some of the freely available WMTS in QGIS3 can be done in a few clicks, creating your own is evenly simple. On the beginning of the process, you have to have an image you want to work with. For those who just want to try it, we recommend using some of the old map images of a place they know.
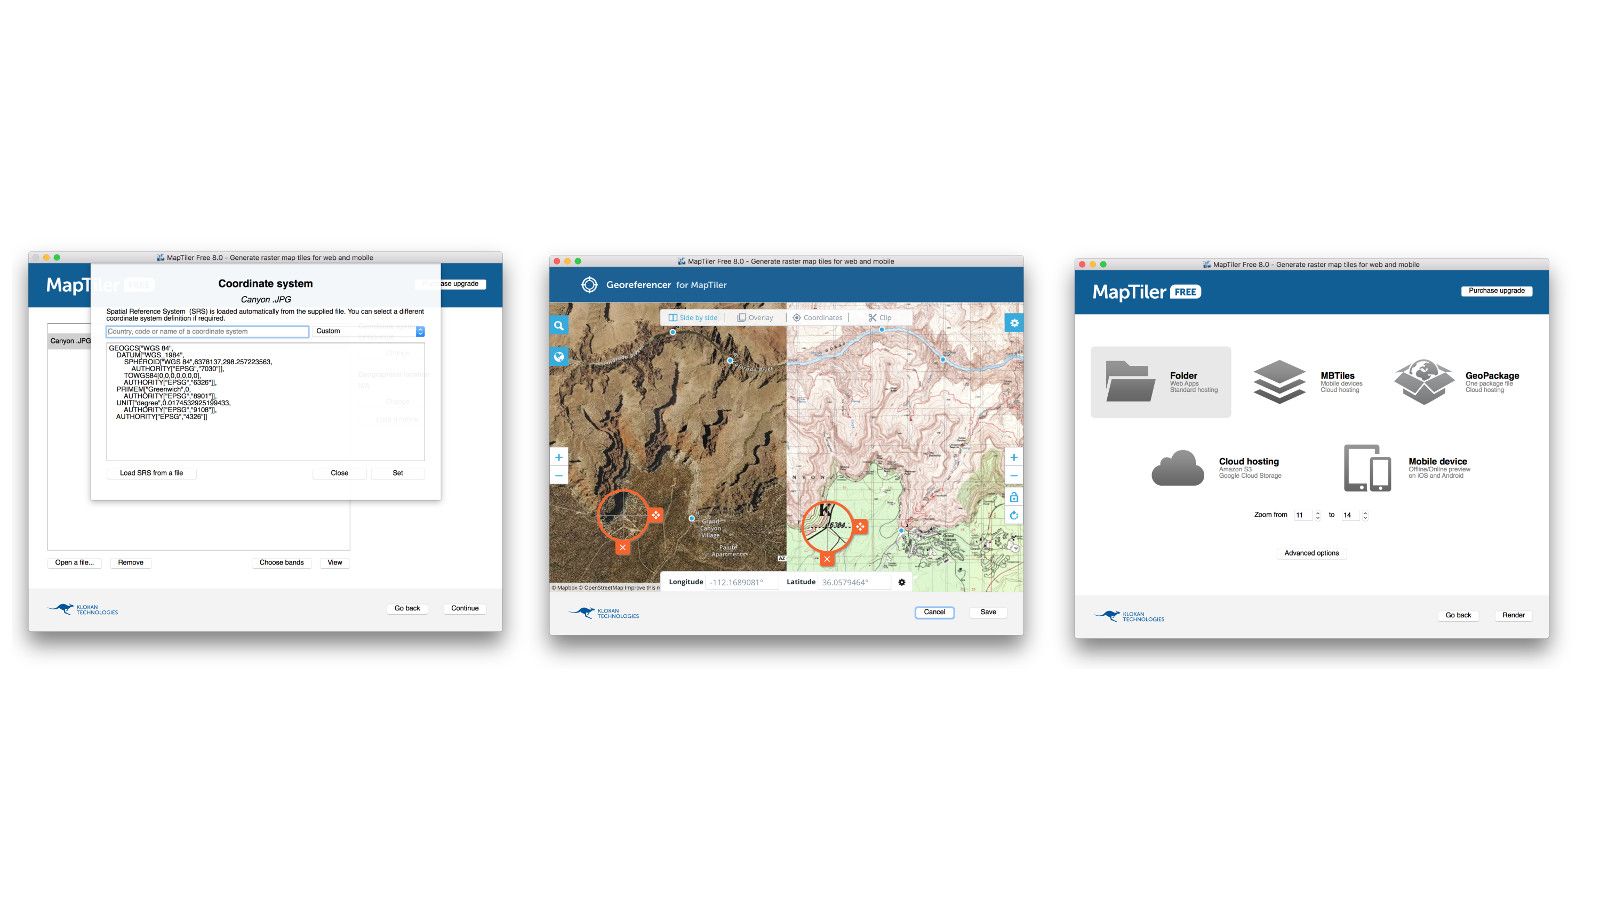
After you download, install and run MapTiler Desktop software, load (or drag and drop) an image into the program, the graphical wizard will guide you through the whole process.
First, you will be asked to set the coordinate system. Unless you have a specific requirement, leave this field blank and click on Set button. In the next window, you have to georeference the image, which in other words means to say where exactly on the planet your image should be placed. Few georeferencing methods are available, however, the most common is the “Assign location visually (Georefrencer)” option. Here you pick at least three points from your image and match them with corresponding points on the map. For higher accuracy, you can match more spots. When your image perfectly fits the map, click on “Save” and select the output format for your work in next step.
For loading in QGIS as WMTS, select “Folder” option and click “Render”. You will be asked to select a folder for the output. When rendering is completed, you will find there all the files you need. By opening index.html, you can preview your work in a web browser. Set coordinate system, do visual georeference and select an output format. That’s it, now you can start to use your work in QGIS.
Upload to a web hosting or Amazon S3
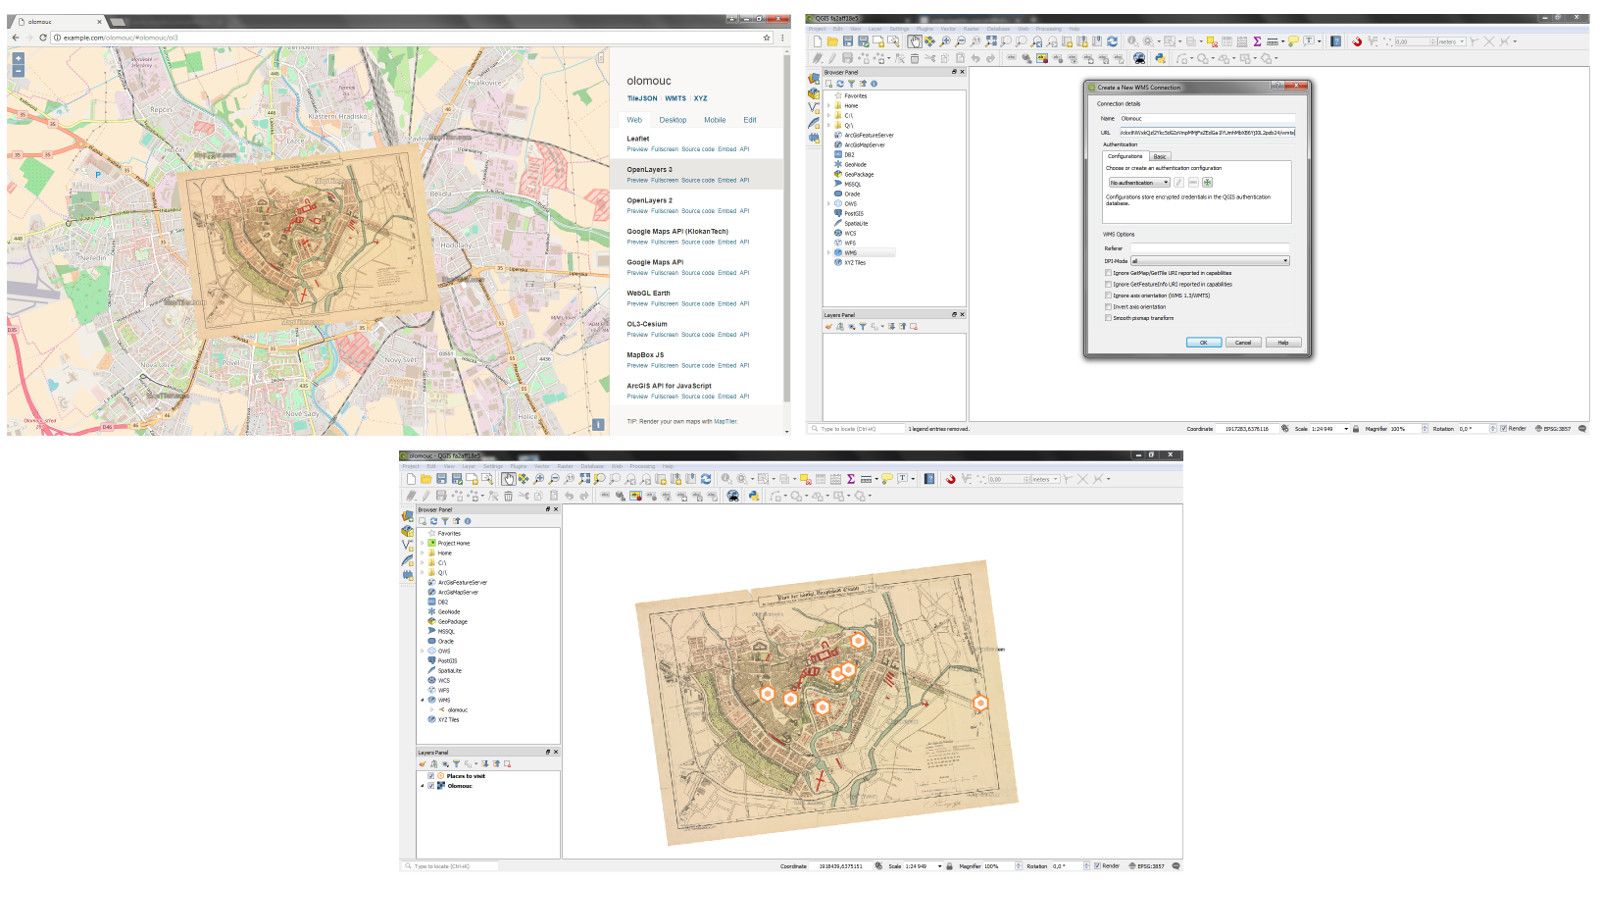
Creating your own WMTS service requires just uploading your work to the hosting. Drag the folder with all the files made by MapTiler Desktop, upload it to the web hosting (you can also use a free hosting: just make sure it is not adding advertisement into the content) using FTP client and open the URL in web browser. Now there is in the left menu, under “Desktop” link, available a step-by-step guide for loading your project in QGIS.
In the right panel, click on the WMTS link, which will open an XML file. Do not pay attention to the content, just copy the file’s URL. You can also serve tiles from a PHP hosting using TileServer-PHP or upload your map directly to Amazon S3 server to use the power of the serverless solution.
Open your WMTS in QGIS3
In QGIS3, right click on the “WMS” option in the “Browser Panel”, select “New Connection…”, pick a name for your layer and paste the URL of the XML file you just copied in the browser. By clicking “Ok”, a new connection will be created. Unroll the WMS option and double click on your newly created layer. It will load into the “Layers Panel” and automatically activate in the main window. Now you can explore the layer or start using it for geospatial analysis.
To improve the look of any WMS/WMTS in QGIS, just right click on the layer in “Layers panel”, select “Properties” and in “Styles” set the “Resampling” method for “out” to “Average”.
Loading your WMTS in the QGIS2 is the same, the only change is a slightly different look of “Create a new WMS connection” window. When uploaded to a web hosting, your work can be served as WMTS service
GeoPackage or MBTiles for local offline use
Alternatively, you can render your map into GeoPackage or MBTiles format and open it directly in QGIS. This can be done by drag and drop the .gpkg or .mbtiles file in the main window or by clicking the “Add Raster File” button. This is especially useful if you want to work on one computer only and completely offline.
Drag and drop the .gpkg or .mbtiles file into the main QGIS window to open the files locally.
We have seen that creating your own WMTS service from an image is very simple. To try it yourself, download the MapTiler Desktop for Windows, Mac, Linux, or any other platform running Docker container technology.
If you need a help, visit the MapTiler how-to.

